If your bed feels too low, you’re not alone. Many homeowners look for ways to raise their beds to create extra storage, improve accessibility, or make their bedrooms more comfortable. While store-bought risers are widely available, DIY bed risers can be cheaper, stronger, and fully customizable to your needs.
Whether you’re looking for homemade DIY bed risers for a wooden bed, sturdy DIY bed risers for a metal frame, or a practical solution for under-bed storage, this guide covers everything you need to know.
Quick Pick: Which DIY Bed Riser Is Best?
| Need | Best Option |
| Best Overall | Wooden Block Bed Risers |
| Cheapest Option | Cinder Block Bed Risers |
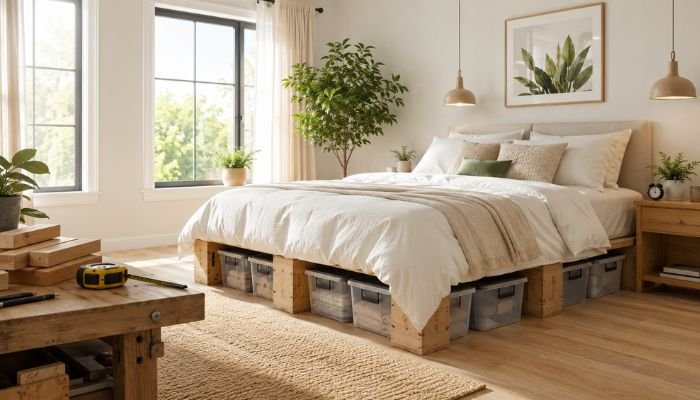
| Best for Metal Frames | Custom Wood Risers with Recessed Pockets |
| Best for Heavy Beds | 4×4 Lumber Risers |
| Best for Storage | Pallet Platform Risers |
| Best for Acid Reflux | Head-of-Bed Wood Risers |
| Best Appearance | Premium Hardwood Risers |
What Are DIY Bed Risers?
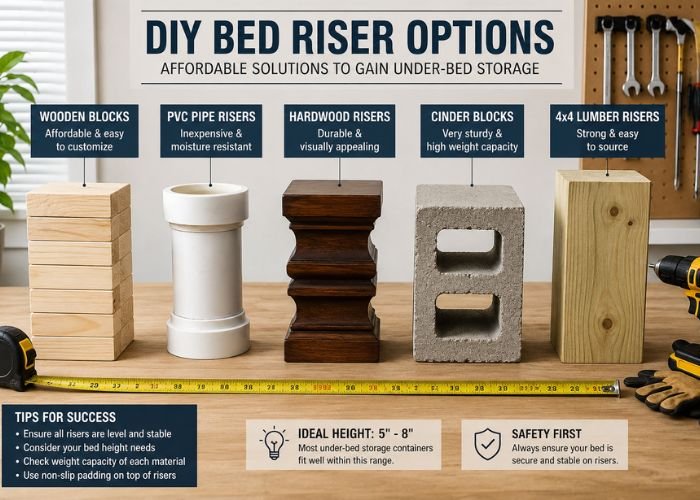
DIY bed risers are homemade supports placed beneath bed legs or bed frames to increase overall bed height. Most risers add between 2 and 12 inches of elevation, depending on the design.
People use DIY bed risers for several reasons:
- Create extra under-bed storage
- Improve accessibility
- Raise low-profile bed frames
- Make cleaning easier
- Improve bedroom aesthetics
- Elevate the head of the bed for acid reflux relief
Unlike standard plastic risers, homemade bed risers can be customized for height, weight capacity, appearance, and budget.
Choosing the Right DIY Bed Riser
Not every DIY bed riser works for every situation.
- Need extra storage? Choose pallet platform risers or storage box risers.
- Have a metal bed frame? Use custom wooden risers with recessed pockets and rubber liners.
- Working with a tight budget? Scrap wood and cinder blocks offer the lowest costs.
- Want a furniture-quality appearance? Premium hardwood risers provide the best finish.
- Supporting a king-size bed? Heavy-duty 4×4 lumber or corner support risers are the safest choices.
Before You Start: Measure First
Before building homemade DIY bed risers, measure:
- Bed leg width
- Bed frame dimensions
- Desired height increase
- Combined weight of the bed, mattress, and occupants
How High Should You Raise Your Bed?
2–4 inches: Ideal for minor adjustments and easier cleaning.
4–8 inches: Best for most homeowners who need additional storage.
8–12 inches: Suitable for maximum storage but requires stronger materials and extra stability precautions.
Weight Capacity Guidelines
Always calculate:
Bed Frame + Mattress + Occupants + Bedding
Then choose materials that provide at least a 25%–50% safety margin.
Actual capacity depends on build quality and weight distribution.
| Material | Estimated Safe Load |
| PVC Pipe Risers | 200–300 lbs |
| Wooden Block Risers | 400–600 lbs |
| Hardwood Risers | 600–800 lbs |
| 4×4 Lumber Risers | 800+ lbs |
| Cinder Block Risers | 1,000+ lbs |
Tools and Materials You’ll Need
Depending on your chosen method, you may need:
- Wood blocks
- 4×4 lumber
- PVC pipe
- Cinder blocks
- Measuring tape
- Drill
- Saw
- Sandpaper
- Wood screws
- Wood glue
- Rubber pads
- Felt floor protectors
- Paint or stain
15 DIY Bed Riser Ideas

1. Wooden Block Bed Risers
Height: 4–8 inches
Cost: $10–$30
Build Time: 30–60 minutes
Materials:
- Solid wood blocks
- Drill
- Sandpaper
- Rubber pads
Steps:
- Cut wood blocks to equal heights.
- Drill shallow recesses for bed legs.
- Sand edges and attach non-slip pads.
Pros:
- Strong and durable
- Easy to customize
- Attractive appearance
Cons:
- Requires basic woodworking tools
Best For: Most bed frames and bedrooms.
2. DIY Furniture Leg Risers
Height: 2–6 inches
Cost: $10–$25
Build Time: 30–45 minutes
Materials:
- Hardwood blocks
- Drill
- Sandpaper
- Rubber pads
Steps:
- Cut hardwood blocks to size.
- Create shallow recesses for legs.
- Add rubber pads for stability.
Pros:
- Works for beds and furniture
- Beginner-friendly
Cons:
- Requires custom sizing
Best For: Beds, couches, desks, and tables.
3. PVC Pipe Bed Risers
Height: 4–10 inches
Cost: $15–$25
Build Time: 30–45 minutes
Materials:
- 4-inch PVC pipe
- End caps
- Rubber liners
Steps:
- Cut equal pipe lengths.
- Attach end caps.
- Install rubber liners to prevent slipping.
Pros:
- Inexpensive
- Lightweight
- Moisture-resistant
Cons:
- Lower weight capacity than wood
Best For: Budget-friendly projects.
4. Heavy-Duty 4×4 Lumber Risers
Height: 4–8 inches
Cost: $20–$40
Build Time: 45–60 minutes
Materials:
- 4×4 lumber
- Saw
- Sandpaper
Steps:
- Cut equal sections of lumber.
- Create shallow leg pockets.
- Sand and install beneath bed legs.
Pros:
- Extremely strong
- Supports heavy mattresses
Cons:
- Bulkier appearance
Best For: King-size and heavy beds.
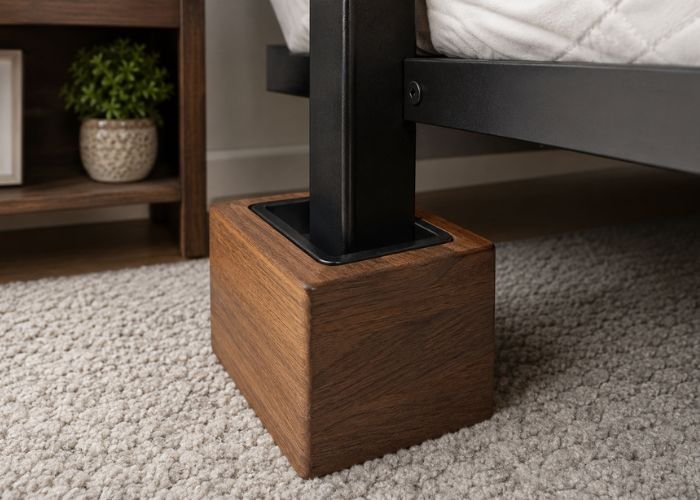
5. DIY Bed Risers for Metal Frames
Height: 4–8 inches
Cost: $15–$35
Build Time: 1 hour
Materials:
- Wood blocks
- Rubber liners
- Drill
Steps:
- Measure metal frame leg diameter.
- Drill recessed pockets into wood blocks.
- Add rubber liners and install.
Pros:
- Reduces sliding
- Custom fit
Cons:
- Requires accurate measurements
Best For: Metal bed frames.
6. Pallet Platform Risers
Height: 4–12 inches
Cost: $0–$30
Build Time: 1–2 hours
Materials:
- Wooden pallets
- Sandpaper
- Paint or stain
Steps:
- Clean and sand pallets.
- Arrange pallets beneath bed frame.
- Secure and finish as desired.
Pros:
- Creates storage space
- Rustic appearance
Cons:
- Requires sanding
Best For: Storage-focused bedrooms.
7. Stackable Wooden Box Risers
Height: 4–10 inches
Cost: $20–$40
Build Time: 1–2 hours
Materials:
- Plywood
- Screws
- Drill
Steps:
- Build four identical wooden boxes.
- Reinforce corners.
- Stack for adjustable height.
Pros:
- Flexible height options
- Strong support
Cons:
- More labor-intensive
Best For: Adjustable setups.
8. Cinder Block Bed Risers
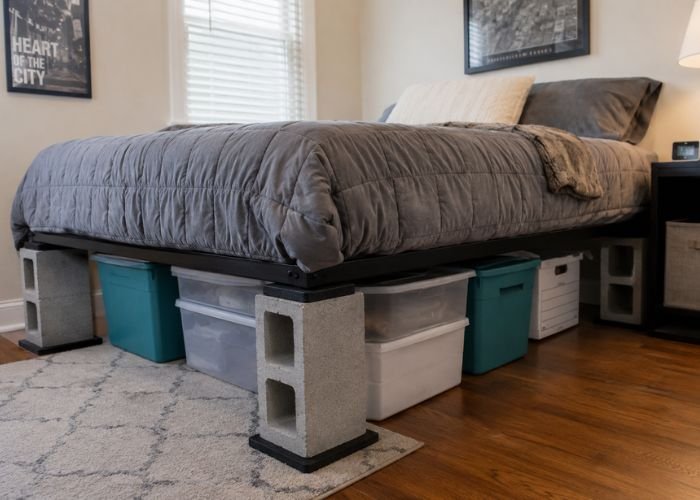
Height: 6–8 inches
Cost: Under $15
Build Time: 15 minutes
Materials:
- Four cinder blocks
- Rubber pads
Steps:
- Place pads beneath blocks.
- Position blocks evenly.
- Carefully lower bed onto blocks.
Pros:
- Extremely strong
- Very inexpensive
Cons:
- Industrial appearance
Best For: Budget-conscious homeowners.
9. Decorative Cube Risers
Height: 4–8 inches
Cost: $20–$50
Build Time: 1–2 hours
Steps:
- Build decorative wood cubes.
- Sand and finish surfaces.
- Install beneath bed legs.
Pros:
- Stylish appearance
- Customizable finish
Cons:
- More time-consuming
Best For: Modern bedrooms.
10. Adjustable DIY Bed Risers
Height: 4–12 inches
Cost: $25–$50
Build Time: 1–2 hours
Steps:
- Create nested riser sections.
- Test different heights.
- Secure selected height.
Pros:
- Adjustable
- Future-proof
Cons:
- More complex design
Best For: Changing storage needs.
11. Repurposed Furniture Risers
Height: 3–8 inches
Cost: $0–$20
Build Time: 30–60 minutes
Steps:
- Remove furniture legs or supports.
- Inspect for structural integrity.
- Install beneath bed frame.
Pros:
- Eco-friendly
- Low cost
Cons:
- Variable strength
Best For: Upcycling projects.
12. Storage Box Risers
Height: 6–10 inches
Cost: $20–$60
Build Time: 2–3 hours
Steps:
- Build reinforced storage boxes.
- Position beneath frame corners.
- Secure and load storage compartments.
Pros:
- Dual functionality
- Maximizes space
Cons:
- Larger footprint
Best For: Small apartments.
13. Corner Support Risers
Height: 4–8 inches
Cost: $20–$40
Build Time: 1 hour
Steps:
- Build corner support blocks.
- Position beneath frame corners.
- Test stability.
Pros:
- Excellent weight distribution
- Strong support
Cons:
- Requires accurate measurements
Best For: Platform beds.
14. Scrap Wood Bed Risers
Height: 4–8 inches
Cost: Under $10
Build Time: 30–45 minutes
Steps:
- Gather usable scrap lumber.
- Cut equal-sized blocks.
- Sand and install.
Pros:
- Cheapest option
- Easy project
Cons:
- Appearance varies
Best For: DIYers on a budget.
15. Premium Hardwood Bed Risers
Height: 4–8 inches
Cost: $30–$60
Build Time: 1–2 hours
Materials:
- Oak, maple, or walnut
- Stain
- Protective finish
Steps:
- Cut hardwood blocks.
- Sand thoroughly.
- Apply stain and finish.
Pros:
- Furniture-quality appearance
- Long-lasting durability
Cons:
- Higher material cost
Best For: High-end bedroom furniture.
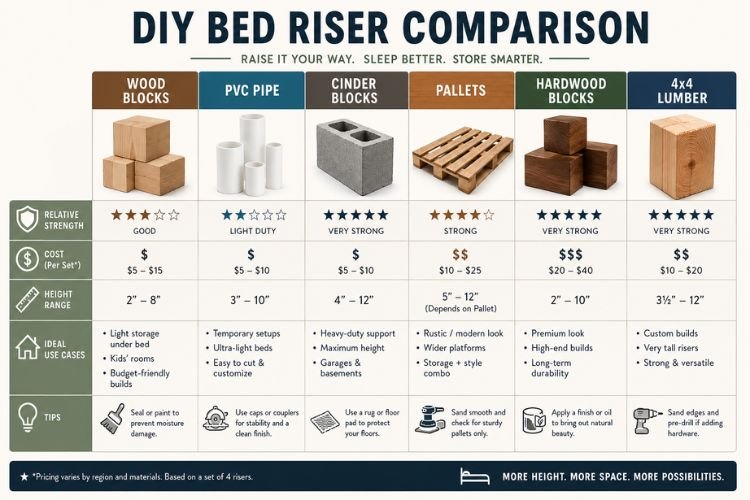
Comparison Table
| Method | Cost | Height | Time | Strength | Best For |
| Wood Blocks | $10–$30 | 4–8 in | 30–60 min | High | Most Beds |
| PVC Pipe | $15–$25 | 4–10 in | 30–45 min | Medium | Budget Builds |
| 4×4 Lumber | $20–$40 | 4–8 in | 45–60 min | Very High | Heavy Beds |
| Pallets | $0–$30 | 4–12 in | 1–2 hrs | High | Storage |
| Cinder Blocks | Under $15 | 6–8 in | 15 min | Very High | Cheapest Option |
| Hardwood | $30–$60 | 4–8 in | 1–2 hrs | High | Premium Look |
DIY Bed Risers for Metal Frames
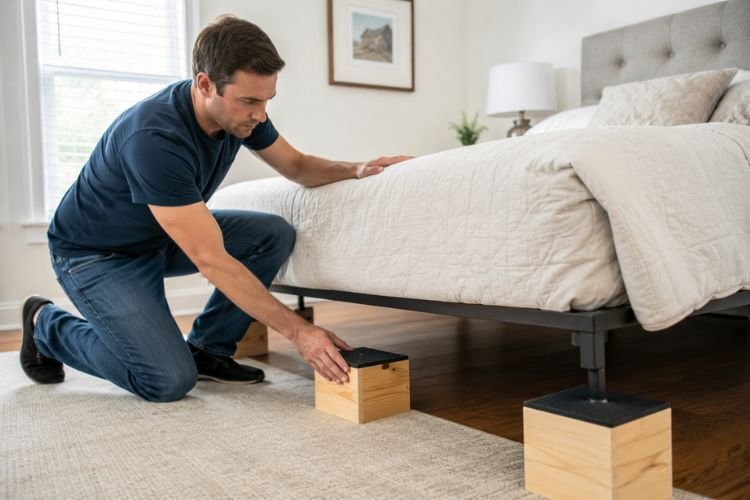
Metal bed frames require extra attention because their legs are often narrower and more prone to movement.
For the safest installation:
- Measure each leg carefully.
- Create recessed pockets in wooden risers.
- Install rubber liners inside the recesses.
- Test stability before use.
Custom wooden risers generally provide better support than generic plastic alternatives.
DIY Bed Risers for Acid Reflux
Some people elevate the head of their bed to help reduce nighttime acid reflux symptoms.
A common approach is placing risers beneath the headboard side only, creating a gentle incline of approximately 4–6 inches.
While bed elevation may help some individuals, it is not a medical treatment. Consult a healthcare professional if symptoms persist.
Safety Tips
Use Strong Materials
Avoid weak plastics, cardboard, or unstable materials.
Keep All Risers Equal
Uneven risers can cause wobbling and increase stress on the frame.
Add Non-Slip Pads
Rubber pads improve grip and protect flooring.
Test Stability
Before sleeping on the bed:
- Sit on each corner
- Apply gentle side pressure
- Check for movement
- Verify all risers remain level
Inspect Regularly
Every three to six months:
- Check for cracks
- Tighten fasteners
- Replace worn pads
- Verify stability
Frequently Asked Questions
Are DIY bed risers safe?
Yes. When built from strong materials and installed correctly, DIY bed risers can be as safe as commercial products.
How many risers do I need for a queen or king bed?
Most queen beds require four risers. Heavy king-size beds may benefit from additional center support.
What is the best material for DIY bed risers?
Solid wood provides the best balance of strength, appearance, affordability, and customization.
Can bed risers void my mattress warranty?
Some manufacturers require approved support systems. Review warranty documentation before modifying your bed setup.
Can DIY bed risers be used on carpet?
Yes, but check stability carefully since carpet can compress unevenly.
Are cinder block bed risers safe on tile floors?
Yes, provided you use rubber or felt pads to prevent slipping and protect grout lines.
Can DIY bed risers damage hardwood floors?
Not if you install protective pads underneath each riser.
Can DIY bed risers help with acid reflux?
Elevating the head of the bed may help some people, but it should not replace medical advice or treatment.
What are the best DIY bed risers for metal frames?
Custom wooden risers with recessed pockets are typically the safest and most stable option.
Final Thoughts
DIY bed risers are one of the simplest and most affordable bedroom upgrades you can make. Whether your goal is creating extra storage, improving accessibility, supporting a metal bed frame, or elevating the head of your bed for comfort, there’s a DIY solution that fits your budget and skill level.
From simple wooden blocks and scrap lumber to pallet platforms and premium hardwood risers, these 15 ideas offer practical ways to raise your bed without spending a fortune. Focus on proper measurements, strong materials, and regular safety checks, and you’ll have a sturdy setup that serves you well for years.
Before starting your project, measure carefully, choose the right material for your bed’s weight, and prioritize stability over height. A well-built set of DIY bed risers can add storage, comfort, and functionality while costing far less than many store-bought alternatives.