
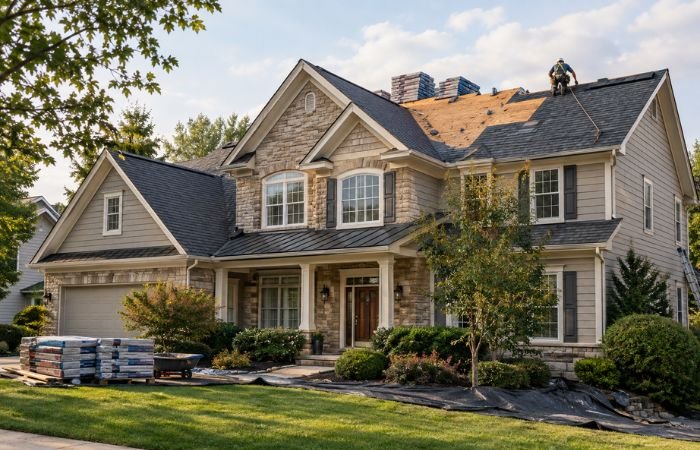
While a roof’s primary job is to keep water out, its deterioration is rarely a sudden event. More often, it’s a gradual process, marked by several key indicators that signal the need for attention. Ignoring these signs can lead to escalating damage, from minor leaks to significant structural compromise. Understanding these critical warning signs is the first step in protecting your home.
Shingle Damage, Granule Loss, and Curling
One of the most visible indicators of an aging or damaged roof is the condition of its shingles. As asphalt shingles age, they undergo several transformations. You might notice their edges beginning to curl, either lifting at the corners (cupping) or bending upwards (clawing). This curling indicates that the shingles are losing their flexibility and are becoming brittle, making them more susceptible to wind and impact damage.
Another tell-tale sign is granule loss. The asphalt shingles are coated with ceramic granules that protect them from the sun’s harsh ultraviolet (UV) rays. Over time, these granules wear off, often accumulating in gutters or at the base of downspouts. When shingles start to “bald,” exposing the asphalt layer beneath, their protective capabilities are severely diminished, accelerating the aging process.
Beyond natural aging, external factors like hail impacts can also cause significant granule loss and visible damage, including dents, cracks, or even missing pieces of shingles. UV degradation is a constant threat, especially in sunny climates, breaking down the shingle material over years. If you observe widespread curling, excessive granule loss, or balding areas, it’s a strong indication that your roof’s protective layer is compromised and may require expert roof repairs or even a full replacement. Addressing these issues promptly can prevent more extensive and costly problems down the line.
Sagging Roof Decking and Interior Leaks
Beyond the surface, problems can manifest within your home’s structure. A sagging roof deck is a serious structural concern. If you notice any dips or unevenness in your roofline when viewed from the ground, or if the roof feels soft or spongy when walked upon, it could indicate weakened or rotted decking underneath. This often results from prolonged moisture exposure, which can stem from persistent leaks or poor attic ventilation leading to excessive condensation.
The most undeniable sign of a failing roof is an interior leak. Water stains on your ceilings or walls are immediate red flags. These stains, often yellowish or brownish, indicate that water has penetrated the roofing materials, underlayment, and attic space before reaching your living areas. Even small, seemingly insignificant stains can point to a larger, hidden problem.
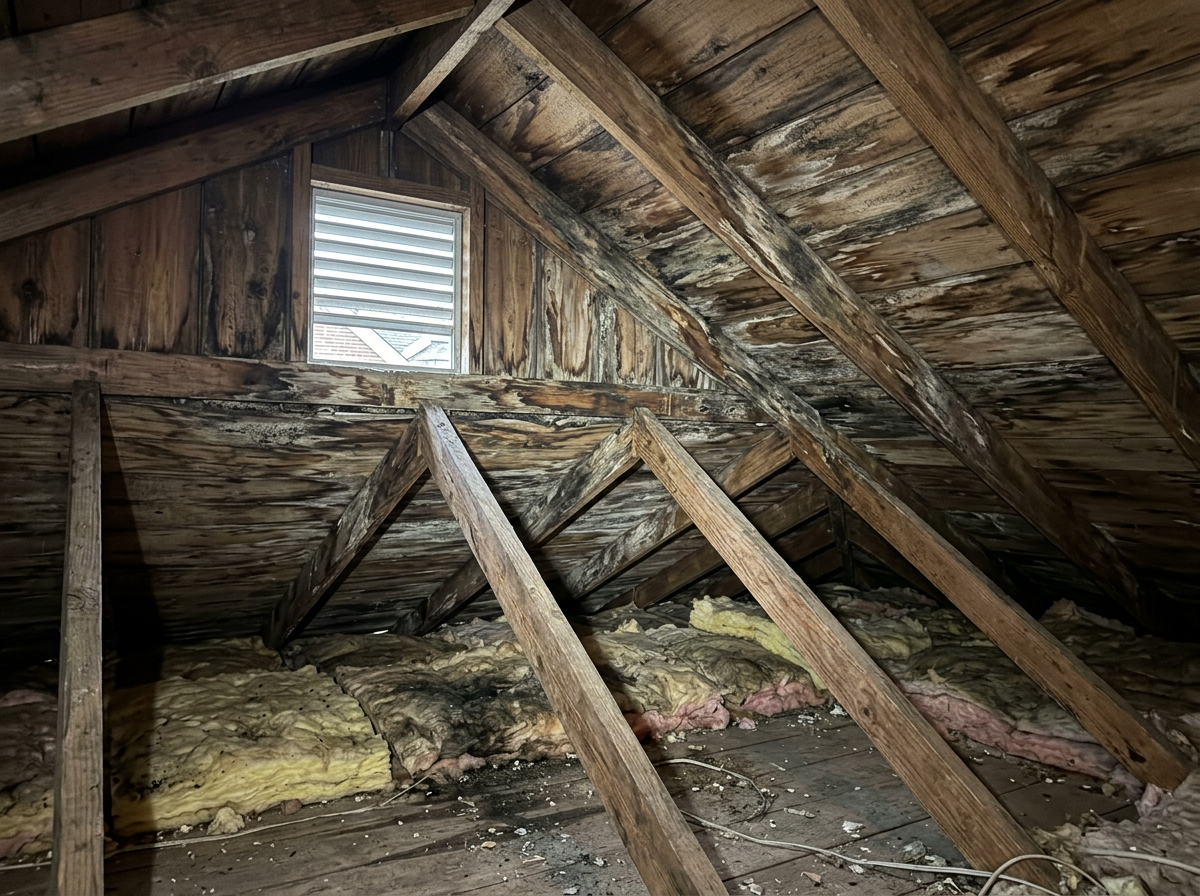
Attic moisture is another critical indicator. If your attic feels damp, smells musty, or you see visible mold growth on rafters or insulation, it’s a clear sign of water ingress or condensation issues. This moisture can lead to widespread wood rot in the decking and rafters, compromising the structural integrity of your entire roof system. Mold not only damages the structure but can also pose significant health risks to your household. Addressing these issues swiftly is paramount to prevent further deterioration and ensure your home remains safe and sound.
Flashing Failures and Valley Vulnerabilities
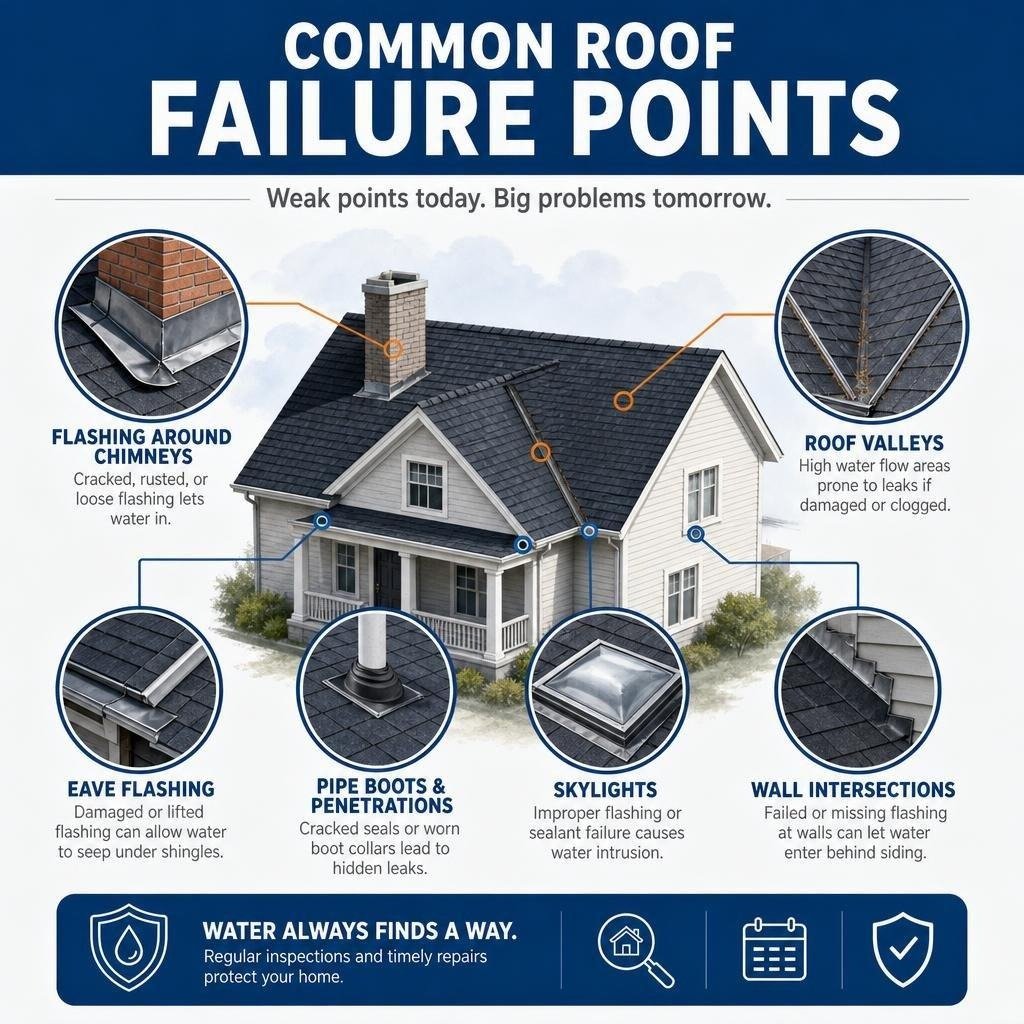
Flashing is a critical component of any roofing system, designed to prevent water penetration at vulnerable points where the roof meets other structures. These areas include chimneys, skylights, vents, and wall intersections. Flashing is typically made of metal (aluminum, copper, or steel) and sealed with caulk or other sealants. Over time, flashing can deteriorate due to exposure to the elements, leading to cracks, rust formation, or detachment. When flashing fails, it creates direct pathways for water to seep into your home, often causing localized leaks that can be difficult to trace.
Roof valleys, where two roof planes meet, are also highly susceptible to water infiltration. These areas channel a significant amount of rainwater and snowmelt, making them high-stress points. If the valley flashing or underlayment is improperly installed, damaged, or has deteriorated, water can easily penetrate the roofing system. Signs of valley vulnerability include visible rust, cracked or missing shingles in the valley, or water stains directly below these areas in your attic or on your ceilings.
Sealant failure around any roof penetration, such as vent pipes or satellite dishes, can also lead to leaks. As sealants age, they can dry out, crack, and lose their adhesive properties, creating gaps for water entry. Regular inspections should include a close look at all flashing and sealed areas. Addressing these vulnerabilities is crucial to maintaining a watertight roof.
Planning a Residential Roof Replacement: Costs and Materials
Once you’ve identified the signs that a roof replacement is imminent, the next step involves careful planning. This stage requires considering various factors, including material lifespan, the impact of your regional climate, installation costs, potential energy efficiency gains, and the specifics of warranty coverage. Making informed decisions at this point can significantly affect your home’s protection and long-term value.
Comparing Materials for Residential Roof Replacement
Choosing the right roofing material is one of the most critical decisions in a residential roof replacement. Each material offers a unique combination of aesthetics, durability, lifespan, and cost. Understanding these differences is key to selecting the best option for your home, budget, and local climate.
Asphalt Shingles: These remain the most popular choice in the U.S. due to their affordability, versatility, and ease of installation.
- 3-Tab Shingles: The most basic and economical, with a flat appearance. Lifespan typically 18-25 years.
- Architectural (Laminate) Shingles: Thicker, more durable, and designed to mimic the look of wood shakes or slate. They offer better wind resistance and a longer lifespan, usually 25-30 years, often with a limited lifetime warranty. They represent excellent value for most homeowners.
- Luxury Shingles: The heaviest and most expensive asphalt option, offering a premium look and enhanced durability.
Metal Roofing: Gaining popularity for its exceptional durability and longevity.
- Standing-Seam Metal: Features raised seams that interlock, providing a sleek, modern look and superior weather protection. Lifespan can be 50-70 years or more.
- Corrugated Metal: A more economical metal option, often used for outbuildings but also finding its way into residential designs.
- Metal Shingles/Tiles: Designed to replicate the look of traditional shingles, slate, or tile, but with the benefits of metal. Metal roofs are also known for their energy efficiency, especially lighter colors that reflect solar heat.
Tile Roofing (Clay or Concrete): Offers a distinct aesthetic, often seen in Mediterranean or Spanish-style homes.
- Clay Tiles: Extremely durable, fire-resistant, and can last 50-100 years. They are heavy and require a robust roof structure.
- Concrete Tiles: A more affordable alternative to clay, offering similar durability and aesthetic versatility. Lifespan 40-70 years.
Natural Slate: The pinnacle of roofing materials in terms of longevity and elegance.
- Slate Tiles: Can last 75-150 years or even longer, making them a “forever roof.” They are very heavy, expensive, and require specialized installation.
Cedar Shakes/Shingles: Provide a rustic, natural look.
- Cedar: Offers good insulation properties but requires more maintenance and has a shorter lifespan (20-40 years) than many other premium materials. Fire resistance can be a concern unless treated.
Energy Efficiency: Many materials now come with “cool roof” options, particularly lighter-colored asphalt shingles and metal roofs, which reflect more solar radiation, reducing heat absorption and potentially lowering cooling costs. This is a significant consideration in warmer climates like Alabama.
Warranty Coverage: Warranties vary significantly by material and manufacturer. Architectural shingles often come with limited lifetime warranties, while metal and slate roofs boast even longer guarantees. It’s crucial to understand what the warranty covers (material defects, labor, transferability) before making a final decision.
Here’s a comparison of common roofing materials, their estimated lifespans, and average installed costs in 2026 for a typical 1,700 sq ft residential roof:
Material Type Typical Lifespan (Years) 2026 Average Installed Cost (1,700 sq ft) Pros Cons 3-Tab Asphalt 18-25 $5,800 – $10,000 Most affordable, easy to install, wide color range Shorter lifespan, less wind resistance, basic appearance Architectural Asphalt 25-30+ $6,000 – $12,000 Better durability, enhanced aesthetics, good wind resistance, cost-effective Shorter lifespan than metal/tile, prone to granule loss over time Standing-Seam Metal 50-70+ $10,000 – $40,000 Exceptional longevity, energy efficient, durable, low maintenance, modern look Higher upfront cost, can be noisy during rain, specialized installation Clay/Concrete Tile 40-100+ $10,000 – $21,000 Very durable, fire-resistant, unique aesthetic, long lifespan Heavy (requires strong structure), fragile (can break), higher cost Natural Slate 75-150+ $40,000 – $55,000+ Extremely long lifespan, premium aesthetic, highly durable, fire-resistant Very high upfront cost, extremely heavy, specialized installation and repair, fragile to walk on Cedar Shakes 20-40 $10,000 – $15,500 Natural, rustic look, good insulation Requires maintenance, fire risk (unless treated), shorter lifespan than premium options, prone to rot/moss
Cost Breakdown and Budget Considerations for Residential Roof Replacement
Understanding the financial aspects of a residential roof replacement involves more than just the cost of shingles. It’s a complex project with several components contributing to the overall expense. The national average for a roof replacement can range significantly, but homeowners in Alabama might expect costs similar to the national average, often falling between $6,000 and $18,000 for an asphalt shingle roof on a typical 1,700 to 2,000 square foot home. However, this can fluctuate based on material choice, roof complexity, and local labor rates.
Here’s a breakdown of the key cost factors:
- Material Costs: This is the most variable component. As seen in the table above, asphalt shingles are the most budget-friendly, while metal, tile, and especially slate can significantly increase the total. Material costs can range from $3.50 to $6.00 per square foot for asphalt shingles, up to $25 per square foot for metal, and even higher for specialty materials.
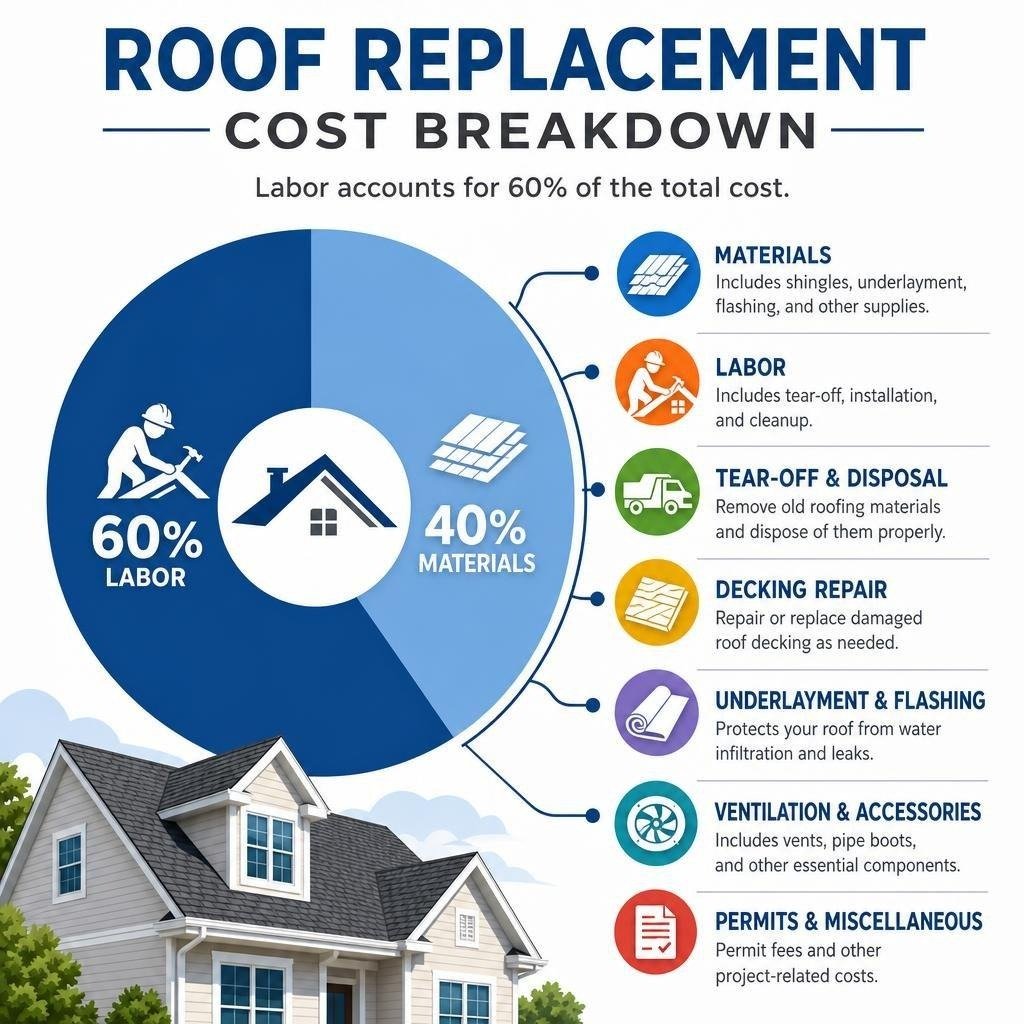
- Labor Costs: Labor typically accounts for a substantial portion of the total project cost, often around 60%. This includes the crew’s wages for tear-off, installation, and cleanup. Factors like roof pitch (steeper roofs require more safety measures and time), height (multi-story homes), and complexity (numerous valleys, dormers, or skylights) will directly impact labor hours and, consequently, the cost. In Alabama, labor rates are generally competitive, but specific regional demand can influence pricing.
- Tear-Off and Disposal: Removing the old roofing material is a labor-intensive process. The cost for this can range from $0.40 to $2.00 per square foot, depending on the number of existing layers and the material being removed. Disposal fees for the old materials are also included here.
- Decking Repair or Replacement: After the old roof is removed, the underlying roof decking (sheathing) is inspected. If there’s rot, water damage, or structural weakness, sections of the decking will need to be replaced. This unforeseen cost can add $2.20 to $3.00 per square foot for materials and labor for each sheet of plywood or OSB.
- Underlayment Upgrades: Modern roofing systems utilize synthetic underlayment, which offers superior protection compared to traditional felt paper. Ice-and-water barriers are also installed in vulnerable areas like eaves, valleys, and around penetrations to provide an extra layer of waterproofing. These components add to the material cost, typically $1.50 to $2.10 per square foot for underlayment and $1.87 to $2.53 per square foot for ice-and-water barrier.
- Flashing and Pipe Boots: Replacing or upgrading flashing around chimneys, vents, and skylights, as well as new pipe boots for plumbing vents, is essential. These small but crucial components ensure a watertight seal and can cost $9 to $11 per linear foot for flashing and $63 to $85 each for pipe boots.
- Ventilation: Proper attic ventilation is critical for extending the life of your new roof and improving your home’s energy efficiency. This might involve installing new ridge vents, soffit vents, or attic fans.
- Permit Fees: Most municipalities require a building permit for a full roof replacement to ensure the work meets local building codes. These fees vary by location but are a necessary part of the project.
- Additional Components: Other items like new gutters, fascia, or soffit repairs might be recommended or necessary during a roof replacement. While not strictly part of the roof itself, they are often addressed concurrently.
- Contingency Fund: It’s wise to budget an additional 10-15% for unexpected issues, such as extensive decking rot discovered during tear-off.
When seeking estimates, it’s crucial to get detailed, itemized quotes from multiple contractors. This allows you to compare not just the bottom line, but also the scope of work and materials included. For homeowners in Alabama, understanding these elements will empower you to make informed decisions and ensure your investment is sound. For residential and commercial roof repair needs, a thorough understanding of these cost components is invaluable.
What to Expect During the Installation Process
Embarking on a residential roof replacement project can feel daunting, but understanding the process can alleviate concerns. From the initial deck inspection to the final cleanup, a professional roofing contractor follows a systematic approach to ensure quality and efficiency. Key aspects include rigorous safety protocols, meticulous property protection, and thorough cleanup, all designed to minimize disruption and deliver a superior finished product.
Tear-Off vs. Shingle Overlay
One of the first critical decisions in a roof replacement is whether to perform a full tear-off or a shingle overlay (also known as re-roofing over existing shingles).
Shingle Overlay: This involves installing new shingles directly over the existing layer. It’s generally a quicker and less expensive option upfront, as it saves on labor and disposal costs associated with removing the old roof. However, there are significant drawbacks. Most building codes, including those in Alabama, limit residential roofs to two layers of shingles due to weight restrictions. Adding a third layer can put excessive stress on your home’s structure, potentially leading to sagging and even structural damage. Furthermore, an overlay prevents a thorough inspection of the underlying roof decking. Hidden rot, water damage, or structural issues may go undetected, leading to premature failure of the new roof and voiding warranties. Many manufacturers also require a full tear-off for their warranties to be valid.
Full Tear-Off: This process involves stripping all existing roofing materials down to the bare roof decking (sheathing). While more labor-intensive and costly initially, it is almost always the recommended approach. A full tear-off allows the contractor to:
- Inspect the Decking: Crucially, it provides an opportunity to identify and repair any damaged, rotted, or weakened sections of the roof deck. This ensures a solid, stable foundation for your new roof.
- Ensure Code Compliance: It guarantees that your roof will meet current building codes regarding weight and structural integrity.
- Install a Complete System: A full tear-off allows for the installation of a new, integrated roofing system, including proper underlayment, ice-and-water barriers, and flashing, all working together for maximum protection and longevity.
- Validate Warranties: Most manufacturer warranties are contingent on a full tear-off and proper installation of all system components.
While an overlay might seem appealing for its lower immediate cost, the long-term risks, potential for hidden damage, and warranty issues make a complete tear-off the superior and more responsible choice for most homeowners. It ensures your new roof is built on a sound foundation, providing lasting protection and peace of mind.
Timeline, Installation Steps, and Solar Considerations
A residential roof replacement is a multi-day project, but the on-site installation phase is typically efficient. For a standard asphalt shingle roof on a 2,000 sq ft home, the installation itself usually takes 2-4 days, depending on the crew size, weather conditions, and roof complexity. The overall project, including permits, material ordering, and inspections, can span 6-8 weeks from initial contact to final completion.
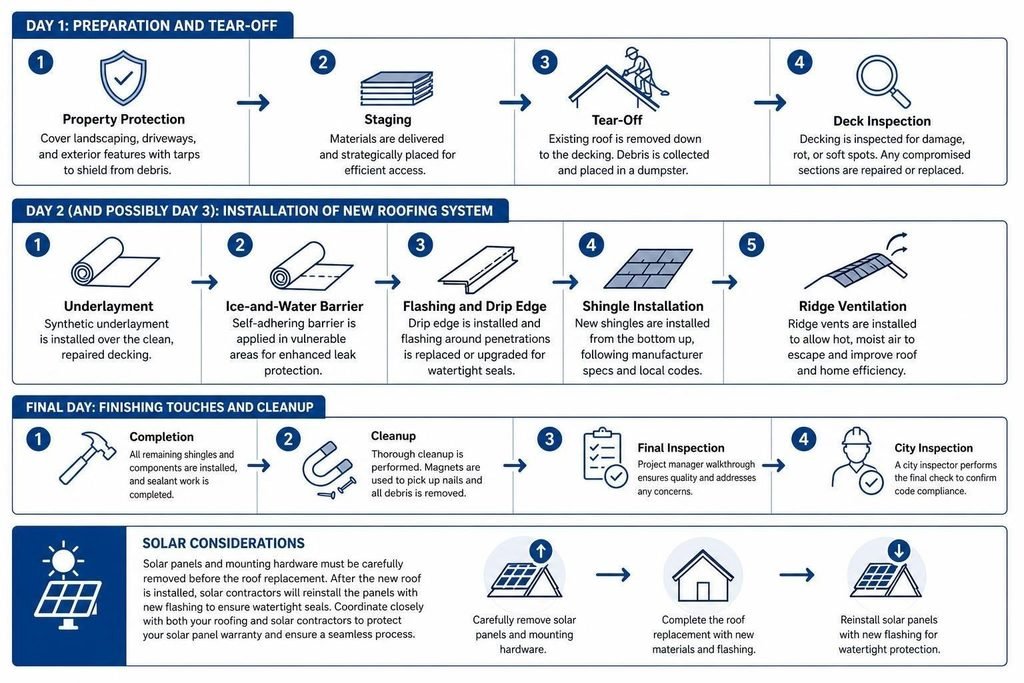
Here’s a typical timeline and breakdown of installation steps:
Day 1: Preparation and Tear-Off
- Property Protection: The crew will arrive and begin protecting your property. This involves covering landscaping, driveways, and exterior features with tarps to shield them from debris.
- Staging: Materials are delivered and strategically placed to ensure efficient access.
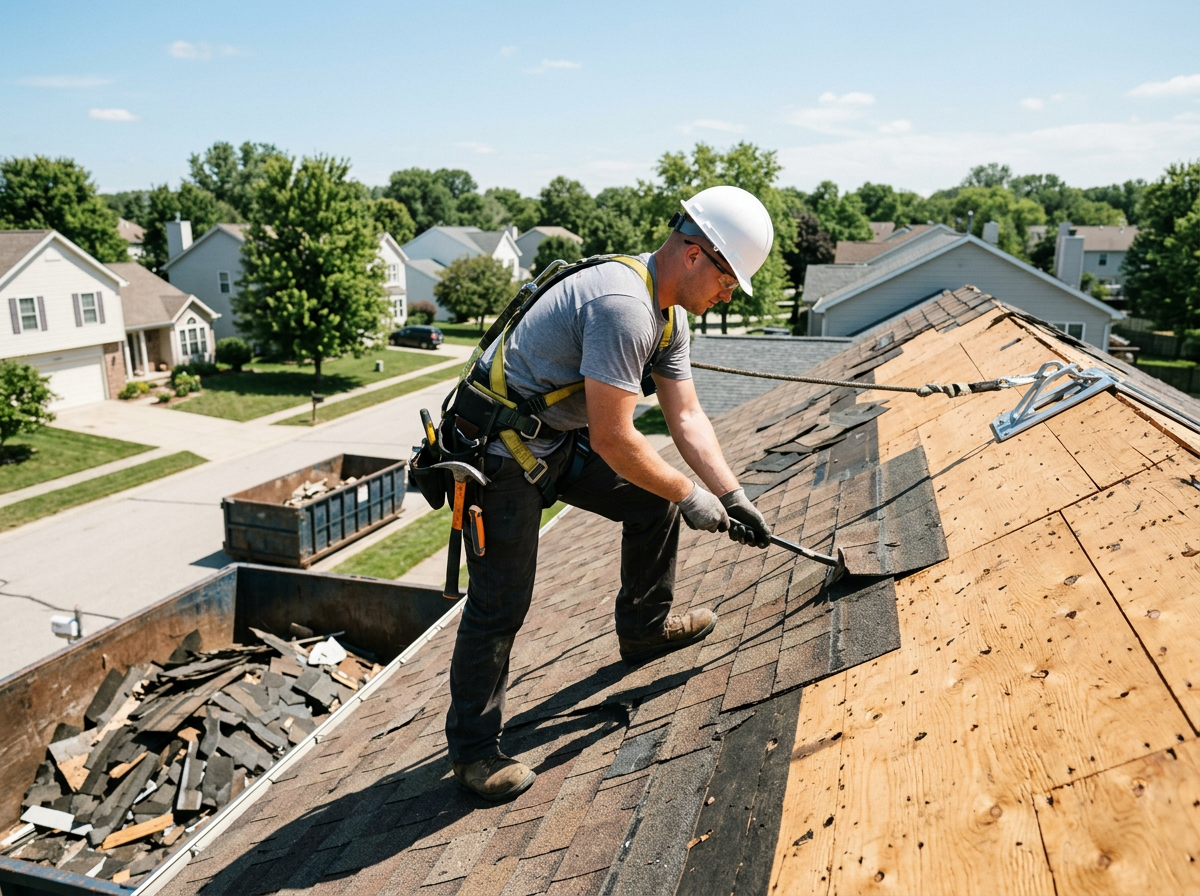
- Tear-Off: The existing roof is systematically removed down to the decking. Debris is immediately collected and placed into a dumpster. This is often the loudest and messiest part of the process.
- Deck Inspection: Once the old materials are removed, the roof decking is thoroughly inspected for any damage, rot, or soft spots. Any compromised sections are repaired or replaced.
Day 2 (and possibly Day 3): Installation of New Roofing System
- Underlayment: A new layer of synthetic underlayment is installed over the clean, repaired decking. This provides an additional barrier against moisture.
- Ice-and-Water Barrier: In vulnerable areas such as eaves, valleys, and around penetrations, a self-adhering ice-and-water barrier is applied for enhanced protection against leaks.
- Flashing and Drip Edge: New drip edge is installed along the roof’s perimeter, and all flashing around chimneys, skylights, and vents is replaced or upgraded to ensure watertight seals.
- Shingle Installation: The new shingles are carefully installed, starting from the bottom edge and working upwards, following manufacturer specifications and local building codes.
- Ridge Ventilation: Proper attic ventilation is installed, often in the form of ridge vents, to allow hot, moist air to escape the attic, which helps extend the life of the new roof and improves home energy efficiency.
Final Day: Finishing Touches and Cleanup
- Completion: All remaining shingles and components are installed, and any necessary sealant work is completed.
- Cleanup: A thorough cleanup is performed. The crew uses magnets to collect stray nails from your lawn and driveway, and all debris is removed.
- Final Inspection: The project manager will conduct a final walkthrough to ensure quality and address any concerns. A city inspector will also perform a final check to confirm code compliance.
Solar Considerations: If your home has solar panels, this adds an extra layer of complexity. The panels and their mounting hardware must be carefully detached and removed before the roof replacement can begin. After the new roof is installed, the solar contractors will return to reinstall the panels, ensuring that all penetrations are properly sealed with new flashing. It’s crucial to coordinate closely with both your roofing and solar contractors to ensure a seamless process and to protect your solar panel warranty. Choosing a contractor known for superior craftsmanship in complex projects like these is highly advisable.
Frequently Asked Questions About Roof Replacement
Navigating a residential roof replacement often brings a host of questions to mind. Homeowners frequently inquire about the project’s duration, what their insurance might cover, and whether winter weather impacts installation. Addressing these common concerns can help you feel more prepared and confident as you plan your roofing project.
How long does a standard asphalt roof replacement take?
The on-site installation phase for a standard asphalt roof replacement typically spans 2 to 4 days. This timeframe is influenced by several factors:
- Roof Size and Complexity: Larger roofs or those with multiple planes, steep pitches, dormers, or numerous penetrations (like skylights or chimneys) will naturally take longer.
- Crew Size: A larger, experienced crew can complete the work more quickly. A typical 4-person crew can strip a 2,000 sq ft roof in 4-6 hours.
- Weather Conditions: Rain, high winds, or extreme temperatures can cause delays. Roofers cannot safely work in inclement weather, and certain materials, like cold-weather adhesives, require specific temperatures for proper bonding.
- Extent of Repairs: If significant decking repair or replacement is needed after the tear-off, this will add to the overall duration.
- Permit and Inspection Scheduling: The overall project timeline, from initial consultation to final inspection, can extend to 6-8 weeks, as it includes time for permits, material delivery, and city inspections.
While the physical work is relatively quick, it’s important to account for the entire process when planning your schedule.
Does homeowners insurance cover roof replacement?
Homeowners insurance typically covers roof replacement only if the damage is caused by a “covered peril” as defined in your policy. These usually include:
- Wind Damage: Strong winds can lift, tear off, or damage shingles.
- Hail Impact: Hailstorms can cause dents, cracks, and granule loss, compromising the shingle’s protective layer.
- Fire: Damage from a house fire is generally covered.
- Falling Objects: Damage from falling trees or other objects.
What is NOT typically covered:
- Age-Related Wear and Tear: Insurance does not cover roofs that simply wear out due to old age, lack of maintenance, or gradual deterioration.
- Pre-Existing Damage: Damage that occurred before your policy’s effective date.
- Neglect: If the roof failure is due to a lack of proper maintenance, the claim may be denied.
Key Considerations:
- Deductible: You will be responsible for paying your policy’s deductible.
- Actual Cash Value (ACV) vs. Replacement Cost Value (RCV): Some policies pay out the actual cash value (depreciated value) of your roof, while others offer replacement cost value (the cost to replace with new materials). RCV policies are generally more favorable.
- Documentation: Always document damage with photos and contact your insurer promptly. A professional roofing contractor can often assist with the insurance claims process.
It’s crucial to review your specific policy to understand your coverage limitations and discuss any potential claims with your insurance provider.
Can a new roof be installed during winter months?
Yes, a new roof can be installed during winter months, but there are specific considerations and challenges:
- Cold-Weather Adhesives: Asphalt shingles rely on heat to seal properly. In cold temperatures, the adhesive strips may not activate, which can make the shingles more susceptible to wind uplift until warmer weather arrives. Some manufacturers offer shingles with cold-weather-specific adhesives, or contractors may use hand-sealing techniques.
- Shingle Brittleness: Shingles become more brittle in cold weather, making them more prone to cracking or breaking during installation. This requires roofers to handle them with extra care.
- Thermal Sealing: The final thermal sealing of shingles might not occur until spring when temperatures consistently rise above 40-50°F (4-10°C). Until then, the roof might not be fully sealed against wind-driven rain.
- Extended Timeline: Shorter daylight hours and the potential for snow or ice can extend the project timeline.
- Contractor Availability: Winter can sometimes be a slower period for roofing contractors, potentially leading to better scheduling flexibility or even slight cost savings.
While winter installation is feasible, it’s important to work with a contractor experienced in cold-weather roofing. They will take necessary precautions, such as storing materials in heated areas, using appropriate tools, and ensuring proper safety measures for working on potentially icy surfaces. They will also advise you on the timeline for full thermal sealing.
Conclusion
Recognizing the signs that your residential roof needs replacement is a critical step in safeguarding your home and your investment. From subtle shingle degradation and granule loss to more alarming interior leaks and sagging, these indicators are your home’s way of communicating a need for attention. Proactive identification and planning for a roof replacement can prevent minor issues from escalating into major, costly structural damage.
Choosing the right materials, understanding the comprehensive cost breakdown, and knowing what to expect during the installation process are all vital components of a successful project. Whether opting for the enduring value of architectural shingles or the longevity of metal, a well-planned replacement enhances your home’s protection, improves energy efficiency, and significantly boosts its curb appeal and property value.
A new roof is more than just a repair; it’s a long-term investment in your home’s structural safety and your family’s peace of mind. By staying informed and acting decisively, you can ensure your home remains a secure and comfortable haven for decades to come, backed by a robust, long-term warranty.


