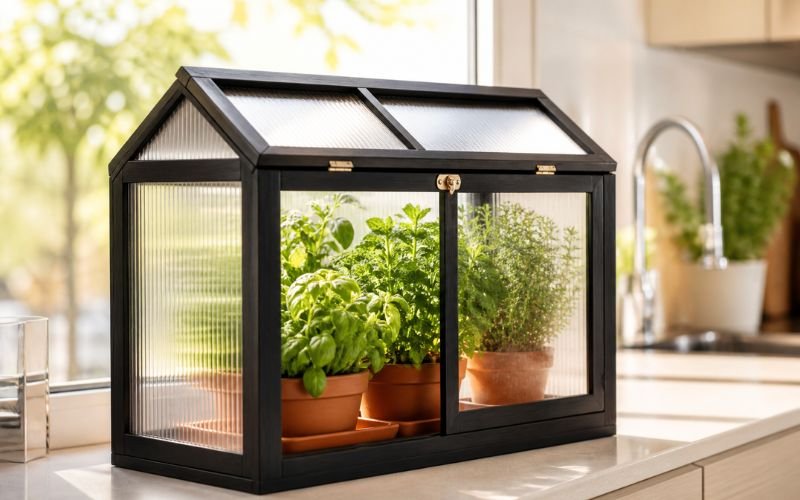
A mini indoor greenhouse is one of those projects that looks impressive but is genuinely straightforward to put together. Whether you want a little herb patch on the kitchen counter or a home for a few succulents on a sunny windowsill, a tabletop greenhouse keeps plants happy while looking great in a home.
What You’ll Need Before You Start
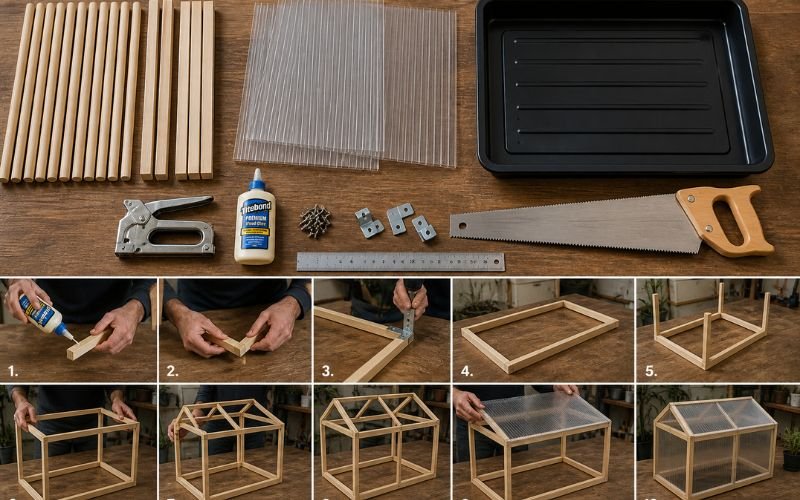
The materials list is short. You’ll need a basic timber frame (thin wooden dowels or square section batten work well), a glazing material, some wood glue or small corner brackets, a staple gun or tacks, and a small drip tray for the base. A saw, a ruler, and sandpaper round things out.
Budget-wise, most of this comes in under £20 from a DIY store. The glazing is where people often overspend by defaulting to glass, but there’s a better option.
Why Polycarbonate Works Better Than Glass
For a small indoor build like this, glass adds unnecessary weight and risk. A transparent polycarbonate sheet is the smarter choice. It’s lighter, shatter-resistant, and just as clear as glass once it’s cut and fitted. If a shelf wobbles or a cat gets curious, you won’t end up with broken pieces everywhere.
Polycarbonate is also easy to cut with a craft knife and straight edge, which makes it practical for a project like this. Most suppliers sell it in small sheets, so you won’t need to buy more than you need.
How to Build the Frame
Start by deciding on your dimensions. A frame roughly 30cm wide, 20cm deep, and 30cm tall is a manageable size for a windowsill. Cut your timber pieces to length, then sand the ends smooth.
Build a simple box base first, using wood glue at the joints and reinforcing with small corner brackets if needed. Let it dry fully before moving on. Then add vertical uprights at each corner and a top frame to complete the basic structure.
Fitting the Panels
Once the frame is dry and stable, cut your polycarbonate to size for each panel. Score it several times with a craft knife along a straight edge, then snap it cleanly. Attach each panel using small tacks or a staple gun along the edges, keeping tension even as you go.
Leave one side or the top panel unattached along one edge so it can open. A small hinge and a magnetic catch will do the job neatly, and you won’t need to lift the whole thing off each time you water.
Planting It Up
Here’s where you get to make it your own. A few herb options that do well in small indoor greenhouses:
- Basil: loves warmth and grows quickly
- Chives: low maintenance and useful in the kitchen
- Mint: keep it in its own pot to stop it taking over
- Thyme: thrives in drier conditions, great for sunny spots
For succulents, you’ll want to leave the top slightly open to allow airflow and avoid excess humidity. Most succulents don’t want to be enclosed in a warm, damp space.
How to Style It for Your Home
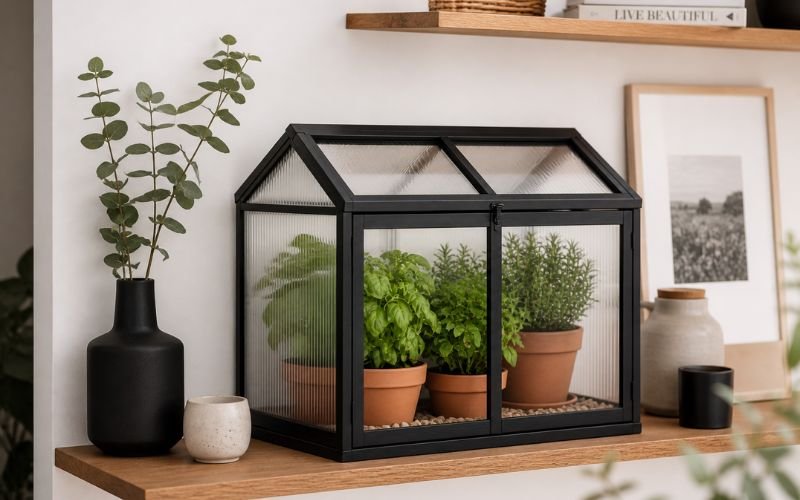
A raw timber frame looks fine, but a coat of paint or wood stain makes it look intentional. Matte black is a popular choice because it contrasts well with greenery and suits most kitchens. Soft white works for a Scandi-style shelf.
Add a small terracotta drip tray underneath and choose matching pots if you want a cohesive look. A couple of small pebbles or a decorative label and the whole thing looks like something you’d find in a shop, not a DIY project.
Signing Off
A tabletop greenhouse is a weekend build that pays off every time you look at it. The materials are cheap, the assembly is straightforward, and the end result genuinely adds something to a kitchen or windowsill. The key is keeping the frame simple and putting a bit of thought into the styling once it’s built.